Let's Program our own Cloud Computing Provider with Python, RabbitMQ and QEMU
In this tutorial I show how we can create a very simple scalable cloud computing provider for fun. It will allow us to start VMs from base images by sending messages to a message broker. All of this will be based on QEMU to run VMs, RabbitMQ to handle messaging and Python for the code.
I always loved tutorials that make use of fun topic and show in only a few lines of code how essentially an extremely big topic can work. Examples are: search engines, virtual machines, databases; see a full list. Of course, they’re not meant to be production-ready, but they’re nice projects and give the readers room to further explore the languages and tools on their own.
Now, I also want to contribute one such project: We will build a small cloud computing provider with Python, RabbitMQ and QEMU. When I’m saying cloud computing here, I essentially mean an on-demand compute platform like EC2. All the managed service offerings that cloud computing providers often offer don’t matter here, we just want to spin up and down virtual machines as desired.
You might be asking “Why doesn’t he use libvirt?”. The reason is that I have used libvirt for a small toy project previously and sometimes had networking issues which I could not understand. Since my goal with this project is to learn basics about Linux networking and other Linux tooling (and at a later stage possibly also distributed applications) I wanted to use raw QEMU over libvirt. For a production project I would use the libvirt daemon.
Before we begin, let’s think about what our cloud computing provider has to be capable of:
- spin up VMs on-demand
- take down VMs on-demand
- allow to use or not use a public IP on a VM
- be scalable in the background, i.e. possibly VMs are on different servers
Possible additions:
- handle multiple customers: I will not deal with this in this tutorial, because I think due to length limitations in some Linux identifiers we cannot encode user-id and vm-id into all object names. This means we would require some sort of database for our state which I want to avoid in this tutorial.
- provide a virtual private network to our VMs, so that they can communicate securely as if they were on a private network
I explicitely excluded bare metal machines from the goals, because neither can I automatically scale bare metal instances nor do I own programmable network equipment. For my goals it has to be possible to implement all the functionality in software.
Table of Contents
What we’ll be doing
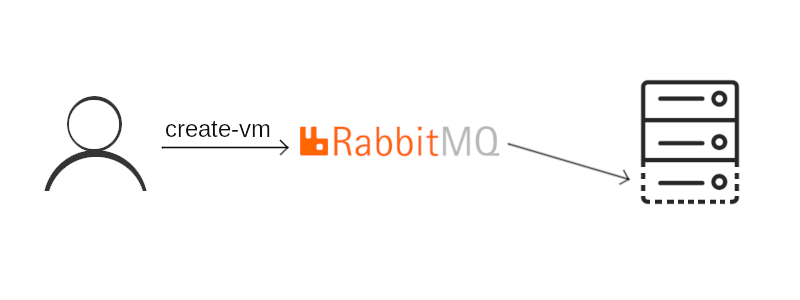
Let’s start with an overview over what we will be creating. At the center of our architecture we have a RabbitMQ instance. RabbitMQ is a message broker which means that it is designed to be a central part in a message-oriented architecture. We can have many components that deliver messages and we can have many components that receive messages. RabbitMQ can make sure that the right recipients receive the messages. In some use cases it might be required that any out of multiple machines receives a message (competing consumers) while in other use cases many machines might have to receive the same message (publish/subscribe).
On each of the host machines (usually bare-metal, but in my case one bare-metal, one VServer) we will have one daemon running. This daemon manages the setup and teardown of a VM on a host. This means: It will setup the networking for the VM, prepare an image to boot from and start the VM. For simplicity, the daemon will be running as root.
On our desktop machine, we have a small command line interface that sends messages containing our intents to the message broker.
RabbitMQ
At first we will install our central component, the RabbitMQ broker. I am using Archlinux, if you use another distribution just search for the package in your package repository and use whatever daemon manager your distribution uses.
pacman -S rabbitmq
systemctl start rabbitmq
In a default setup, RabbitMQ should listen on port 5672. We will create a simple competing consumers pattern with one producer and one consumer to test it. To communicate with a broker that supports AMQP-0-9-1 (which RabbitMQ does) we can use the Python library pika.
For this, we will create a virtual environment and install the library:
virtualenv venv
source venv/bin/activate
pip install pika
In RabbitMQ, to send a message we have to send it to an exchange which will
forward it to a queue. Publishers send to exchanges, consumers are reading
from queues, and RabbitMQ handles the forwarding from exchanges to queues.
In our first simple example, we will use the default exchange which just
forwards the message into a queue with the same name as the routing_key.
The default exchange has the empty name ''.
Before we can actually use a queue, we have to declare it. There are multiple different types of queues we can declare, e.g. queues that are kept over a restart of RabbitMQ or queues that are automatically deleted once the consumer disconnects. In this case, we will create a queue that is kept as long as RabbitMQ is running and will be deleted on a restart of RabbitMQ.
#!/usr/bin/env python

import pika


QUEUE_NAME = 'vm-queue'

connection = pika.BlockingConnection(
    pika.ConnectionParameters(host='localhost'))
channel = connection.channel()

channel.queue_declare(queue=QUEUE_NAME)

channel.basic_publish(
    exchange='', routing_key=QUEUE_NAME, body='one VM please ^_^')
That was simple so far, wasn’t it? The consumer code is not much harder, either. Again, we setup a connection to RabbitMQ declare our queue (since we cannot be sure whether the consumer or the producer will start earlier). Consumption of messages then happens in an infinitely blocking method which calls a callback in our code once a message is received. Thus, we need to process the messaage in a callback.
#!/usr/bin/env python

import pika


QUEUE_NAME = 'vm-queue'

connection = pika.BlockingConnection(
    pika.ConnectionParameters(host='localhost'))
channel = connection.channel()

channel.queue_declare(queue=QUEUE_NAME)


def callback(ch, method, properties, body):
    print('Received message: ' + body.decode('utf-8'))
    ch.basic_ack(delivery_tag=method.delivery_tag)


channel.basic_consume(queue=QUEUE_NAME, on_message_callback=callback)

channel.start_consuming()
You can now run the producer in one terminal and the consumer in another and should be able to see the messages incoming:
[terminal 1] (venv) blog_tutorial $ python rabbitmq_consumer.py
[terminal 2] (venv) blog_tutorial $ python rabbitmq_producer.py
[terminal 1] Received message: one VM please ^_^
Feel free to play around a bit with starting and stopping consumer and producers in different orders and restarting RabbitMQ.
Create a VM
We were able to send a request for a VM from the producer to the consumer, but so far nothing has really happened. The consumer is very dumb and does not know how to create a VM. Let’s change this!
First of all, we will create a base image that we can re-use for all VMs we start. I will use a Ubuntu Server 20.04 for this, of course you can use any other distribution that you want to deploy in your mini cloud environment.
First, let’s create an empty qcow2 image for our system to install to. qcow2 has the advantage that it can grow and only reserves as much space on the host as is actually needed. Moreover, qcow2 can be used as a backing file which we will need later.
qemu-img create -f qcow2 ubuntu_base.qcow2 50G
qemu-system-x86_64 -boot d -cdrom ubuntu-20.04.1-live-server-amd64.iso \
   -m 4096 -hda ubuntu_base.qcow2
After the ISO has been booted, we can follow the installation process and install Ubuntu Server to our yet empty image.
To run a new VM from this base image now, we only have to perform two steps: Copy the existing image so that the OS can write changed data to it without modifying the base image, and then start the VM.
For the first step, QEMU provides a method called backing file. Our base
image will serve as a backing file for a new image, which means that it will
be read-only and all changes will be written to the new image. To create
an image with a backing file we have to
specify the format of the backing file with the -F parameter and the backing
file itself with -b. Then we can boot a VM:
qemu-img create -f qcow2 -b ubuntu_base.qcow2 -F qcow2 ubuntu_testvm.qcow2
qemu-system-x86_64 -smp 4 -m 4096 -hda ubuntu_testvm.qcow2
To automatically start a VM from a message we only have to wait for messages in RabbitMQ and then execute these two commands.
Yet, before we continue let us first define a message format, because
one VM please ^_^ will not be very extensible for further options. We will
use JSON messages with the command in command and additional options for
the command handler in options. Versioning would be reasonable, but
for this tutorial we will omit it. A message to start a VM could look like
this:
{
    "command": "start-vm",
    "options": {
        "image": "ubuntu_base"
    }
}
Let’s adjust our RabbitMQ producer to send this message (hard-coded for now).
import json

# ...

message = json.dumps({
    'command': 'start-vm',
    'options': {
        'image': 'ubuntu_base',
    }
})
channel.basic_publish(
   exchange='', routing_key=QUEUE_NAME, body=message)
In the consumer we will add logic to read the values sent in the message.
Based on the image defined in the message it will try to create a new image
for the VM using the pre-built image as backing file. If this succeeds, it
will start a VM from the image. Since the code has changed quite a lot, I
will list the full code. Most is just error handling, the key aspect are the
two calls to subprocess.run.
Base images will be searched in the folder base_images and the new images for
the VMs will be created in user_images. Make sure that both folders exist
and that the image you created previously is stored in the right folder.
Also note that the path to the backing file in qemu-img create
specified by -b must either be an absolute path or be relative to the
new image file (not relative to your current work dir!). Thus, we pass an
absolute path to the call.
#!/usr/bin/env python

import json
import os
from pathlib import Path
import pika
import subprocess
import sys
import uuid


QUEUE_NAME = 'vm-queue'
BASE_IMAGE_FOLDER = Path('base_images')
USER_IMAGE_FOLDER = Path('user_images')

connection = pika.BlockingConnection(
    pika.ConnectionParameters(host='localhost'))
channel = connection.channel()

channel.queue_declare(queue=QUEUE_NAME)


class QemuException(Exception):
    pass


def create_user_image(vm_id: str, image_name: str) -> Path:
    base_image = BASE_IMAGE_FOLDER / f'{image_name}.qcow2'
    if not base_image.is_file():
        raise IOError(f'Image "{image_name}" does not exist')

    user_image = USER_IMAGE_FOLDER / f'{vm_id}.qcow2'

    create_img_result = subprocess.run([
        'qemu-img', 'create', '-f', 'qcow2',
        '-b', str(base_image.absolute()), '-F', 'qcow2', str(user_image)])
    if create_img_result.returncode != 0:
        raise QemuException(f'Could not create image for VM "{vm_id}"')

    return user_image


def callback(ch, method, properties, body):
    message = body.decode('utf-8')
    print('Received message: ' + message)

    data = json.loads(message)
    if 'command' in data and data['command'] == 'start-vm':
        vm_id = str(uuid.uuid4())
        print(f'Starting VM "{vm_id}"')

        try:
            image_name = os.path.basename(data['options']['image'])
        except KeyError:
            print('Image not specified', file=sys.stderr)
            return

        try:
            user_image = create_user_image(vm_id, image_name)
        except (OSError, QemuException) as e:
            print(str(e), file=sys.stderr)
            return

        p = subprocess.Popen([
            'qemu-system-x86_64', '-m', '4096', '-hda', str(user_image)])
        print(f'Started VM "{vm_id}" as process ID {p.pid}')

    ch.basic_ack(delivery_tag=method.delivery_tag)


channel.basic_consume(queue=QUEUE_NAME, on_message_callback=callback)

channel.start_consuming()
I decided to acknowledge all message, independent from success or failure. Another scheme would be to acknowledge only message that lead to successful setup of VMs in which case another machine could retry.
Custom Networking in QEMU
There is one big problem with the current setup of our VMs: By default QEMU uses so called Slirp networking. This is easy to setup and allows our VM to connect to the public internet through the host, but our VM is not reachable from the outside!
This is OK if we only want to try something on this machine, but of course it does not allow us to SSH into our machine (would be nice for cloud computing, wouldn’t it?), nor can we host a publicly reachable server on it. In addition, currently all of our VMs have the same MAC address (and during my tests also IP address, but this will probably depend on how the Linux distribution actually assigns an IP address to the network interface).
Instead of using Slirp network, we should use TAP networking. With TAP networking, QEMU will connect the VM-internal network to a TAP device on the host. Together with Layer-2 bridging, this will allow our VM to act as if it was on the same network as the host.
The setup that we will be using in this tutorial requires root permissions to setup networking for each VM. Thus, the whole daemon then has to run as root.
Let’s create a file called interfaces.py. It will be responsible for
interface management. It will contain three functions at first:
check_device_existence: Checks whether a device already exists, in which case we won’t recreate itinit_bridge: initialize a new bridge, the core of our networking method; this has to be established once on the hostcreate_tap_device: create a new TAP device for the VM to use; this has to be called once per VM
Since we will be calling a lot of executables with subprocess we will also
create a file execution.py with helper functions.
# execution.py

import logging
import subprocess
from typing import List


def run_command_chain(commands: List[List[str]]) -> bool:
    for command in commands:
        logging.debug(f'Running command: {" ".join(command)}')
        result = subprocess.run(command)

        if result.returncode != 0:
            return False

    return True
The function run_command_chain is used to execute a list of commands,
once the first command fails it will return False. If all commands
ran successfully it returns True. Please note that this approach can
result in wrong intermediate states.
With this helper method available, we can implement interfaces.py. For
details about why each ip command is executed, please refer to my article
about QEMU with TAP network for public IPs.
import logging
import subprocess
from typing import Optional

import execution


class NetworkException(Exception):
    pass


def check_device_existence(device: str) -> bool:
    # if ip link show dev [devicename] does not find [devicename], it will
    # write a message to stderr, but none to stdout
    result = subprocess.run(
        ['ip', 'link', 'show', 'dev', device], stdout=subprocess.PIPE,
        stderr=subprocess.DEVNULL)

    if result.stdout:
        return True
    else:
        return False


def init_bridge(
        bridge_device: str, phys_device: str, ip: Optional[str],
        gateway: Optional[str]) -> bool:
    if check_device_existence(bridge_device):
        logging.debug(
            f'Device {bridge_device} already exists, will not re-create')
        return True
    else:
        logging.debug(f'Creating bridge device {bridge_device}')

        commands = [
            ['ip', 'link', 'add', bridge_device, 'type', 'bridge'],
            ['ip', 'link', 'set', bridge_device, 'up'],
            ['ip', 'link', 'set', phys_device, 'up'],
            ['ip', 'link', 'set', phys_device, 'master', bridge_device],
            ['ip', 'addr', 'flush', 'dev', phys_device],
        ]
        if ip:
            commands.append(
                ['ip', 'addr', 'add', ip, 'dev', bridge_device])
        if gateway:
            commands.append(
                ['ip', 'route', 'add', 'default',
                 'via', gateway, 'dev', bridge_device])

        return execution.run_command_chain(commands)


def create_tap_device(
        tap_device_name, bridge_device_name, user) -> bool:
    creation_ok = execution.run_command_chain([
        ['ip', 'tuntap', 'add', 'dev', tap_device_name,
            'mode', 'tap', 'user', user],
        ['ip', 'link', 'set', 'dev', tap_device_name, 'up'],
        ['ip', 'link', 'set', tap_device_name, 'master', bridge_device_name],
    ])

    return creation_ok
These functions allow us to implement the actual setup of networking for our VM. For this, we will adjust the RabbitMQ consumer.
Before we start consuming messages, we will establish the bridge network. If
it was already setup, we don’t have to do anything. Please note that this step
can break your internet connectivity. It also will not work as-is on a
remote server, because there is no private subnet and you probably will not
receive additional IPv4 addresses (or by some other method). If you run it
on a remote server, you probably must adjust some of the steps inside
init_bridge.
If you run it on your local PC you can just restart your PC in case something totally fails. In the following code section you’ll have to adjust the interface names and IPs according to your network setup:
import interfaces

[...]

channel.basic_consume(queue=QUEUE_NAME, on_message_callback=callback)

if not interfaces.check_device_existence('br0'):
    # br0 is the name of the bridge interfaces that will be created
    #     (can be anything)
    # enp0s25 is the name of your ethernet network, often eth0
    # 192.168.0.10/24 is the IP of your computer in the local network including
    #     subnet mask
    # 192.168.2.1 is the IP of your network gateway, in local networks usually
    #     your router
    interfaces.init_bridge('br0', 'enp0s25', '192.168.0.10/24', '192.168.0.1')

channel.start_consuming()
Whenever we start a VM, we have to create a TAP device for it beforehand. However, interface names in Linux are limited regarding the number of characters. It can contain a maximum of 15 visible characters plus null terminating byte.
Since I am not exactly sure how it might break uniform distribution in UUID
if we just cut out a part from it, we will change the random ID of our VMs to
a simple 8 byte string generated with random.
Custom network setup in QEMU is done with -device and -netdev. We will also
need a randomly generated MAC address. If we have two devices with the same
MAC address on our layer-2 bridge, communication will not work. We will be using
local administered MAC addresses which are defined by having the second least
significant bit set. They also must have the least significant bit disabled, because otherwise it would be a
multicast address.
Thus, in interfaces.py we will create a new function called create_mac_address:
import random

# ...

def create_mac_address() -> str:
    # Set second least significant bit of leftmost pair to 1 (local)
    # Set least significant bit of leftmost pair to 0 (unicast)
    mac_bits = (random.getrandbits(48) | 0x020000000000) & 0xfeffffffffff
    mac_str = '{:012x}'.format(mac_bits)
    return ':'.join([
        mac_str[:2], mac_str[2:4], mac_str[4:6],
        mac_str[6:8], mac_str[8:10], mac_str[10:],
    ])
With this helper we can adjust the VM setup routine in the consumer:
import random
import string

# ...
def callback(ch, method, properties, body):
    # ...
    vm_id = ''.join(
        random.choice(string.ascii_lowercase) for i in range(8))

        # ...

        tap_device = f'vm-{vm_id}'
        # TODO: Adjust the TAP user name to your local user - this user
        # will be allowed to connect to TAP when starting a QEMU VM
        if not interfaces.create_tap_device(tap_device, 'br0', 'your-user'):
            print(f'Could not create tap device for VM "{vm_id}"',
                  file=sys.stderr)
            return

        mac_addr = interfaces.create_mac_address()
        print(f'Assigning MAC address "{mac_addr}" to VM "{vm_id}"')

        p = subprocess.Popen([
            'qemu-system-x86_64', '-m', '4096', '-hda', str(user_image),
            '-device', f'virtio-net-pci,netdev=pubnet,mac={mac_addr}',
            '-netdev', f'tap,id=pubnet,ifname={tap_device},script=no,downscript=no',
        ])
   # ...
If you now boot a VM and your local router supports DHCP, you should see that the VM gets an IP from your local network. It can also communicate with other machines on the local network.
List VMs
As a next step, we want to be able to list the VMs. We could try to list all
qemu-system-x86_64 processes, but maybe the same host also runs QEMU
for anything different than our small project. And of course we also want to
be able to distinguish between all running VMs. Thus, we should give each VM
its own name. Luckily, this is possible with QEMU.
Thus, we will add the line -name qemu-vm-VM_ID,process=vm-VM_ID to the start
of our QEMU instance. This will set the window name to qemu-vm-VM_ID and the
process name to vm-VM_ID. Again, we should make sure that the process name
is not longer than 15 characters. This is not a hard limit, but it
simplifies our lives.
p = subprocess.Popen([
   'qemu-system-x86_64', '-m', '4096', '-hda', str(user_image),
   '-device', f'virtio-net-pci,netdev=pubnet,mac={mac_addr}',
   '-netdev', f'tap,id=pubnet,ifname={tap_device},script=no,downscript=no',
   '-name', f'qemu-vm-{vm_id},process=vm-{vm_id}',
])
Now we can list all our running VMs with:
ps -eo comm | grep vm-
Admittedly vm- is not a very safe namespace, but since our VM-ID consists
of 8 bytes you can invent any prefix comprising at most 7 characters.
In Python we can fetch all processes with a specific prefix with the library
psutil. So, let’s install this first:
pip install psutil
Next, we have to add a new command list-vms to our consumer. This section
of code will just iterate all processes, check for their name and if it
matches the correct prefix add it to a list of running VMs:
import psutil

# ...

if 'command' not in data:
    return
elif data['command'] == 'list-vms':
    vms = []
    for proc in psutil.process_iter(['pid', 'name']):
        if proc.name().startswith('vm-'):
            vms.append(proc.name())
elif data['command'] == 'start-vm':
    # ...
Now, you might be wondering how can we return the list of VMs to the caller? Of course, it’s pretty useless if we only print this on the server, but not on the machine of the person who asked for this information.
Direct Reply-To
This is where the Request-Reply pattern of message brokers comes into play. The way to go is that the caller creates a response channel and adds the name of this response channel into its original request. The server can then send a response to the response channel.
This is such a common pattern that RabbitMQ includes an extension called Direct Reply-To.
To use it, we have to setup a consumer on the special queue amq.rabbitmq.reply-to
on the client and when we send a message define the reply-to property with
value amq.rabbitmq.reply-to. On the worker machine we can read the
reply channel from properties.reply_to in our callback function and send a
reploy to this channel. It’s good practice to also include the correlation ID
in the response, but for Direct Reply-To to work this is not mandatory. A
correlation ID is a unique ID that allows us to connect requests and responses
to each other even if there are multiple messages sent and received at the
same time.
So, let’s change the code. I moved the code to list VMs into a function and
at the end of the callback function I added code to respond with a message
in case a response variable has been set (will be set for list-vms, but
currently not for start-vm).
def list_vms() -> List[str]:
    vms = []

    for proc in psutil.process_iter(['pid', 'name']):
        if proc.name().startswith('vm-'):
            vms.append(proc.name())

    return vms

def callback(ch, method, properties, body):
    message = body.decode('utf-8')
    print('Received message: ' + message)

    data = json.loads(message)
    response = None

    if 'command' not in data:
        return
    elif data['command'] == 'list-vms':
        response = list_vms()
    elif data['command'] == 'start-vm':
        # ...

    ch.basic_ack(delivery_tag=method.delivery_tag)

    if response is not None and properties.reply_to:
        ch.basic_publish(
            exchange='',
            routing_key=properties.reply_to,
            properties=pika.BasicProperties(
                correlation_id=properties.correlation_id
            ),
            body=json.dumps(response))
Command Line Interface
As a next step, we need to change our producer to read the responses and display them to the user.
Since we will add a second message to our producer now, we will also extend
it from sending hard-coded messages to a command line interface that really
allows to define values. For this, we will create a new file called
control.py.
The commands we want to use should look like this:
./control.py list-vms
./control.py start-vm --image ubuntu-server-20-4
I will create a class ServerCommunication to handle the RabbitMQ
communication. Argument parsing from the command line is done with argparse.
#!/usr/bin/env python

import argparse
import json
import pika
import sys
import time


class ServerCommunication:
    def __init__(self):
        self.queue = 'vm-queue'

    def __enter__(self):
        self.connection = pika.BlockingConnection(
            pika.ConnectionParameters(host='localhost'))
        self.channel = self.connection.channel()

        self.channel.queue_declare(queue=self.queue)

        self.channel.basic_consume(
            queue='amq.rabbitmq.reply-to',
            on_message_callback=self.on_response,
            auto_ack=True)

        return self

    def on_response(self, ch, method, properties, body):
        print(json.loads(body))

    def send_msg(self, data):
        self.response = None

        self.channel.basic_publish(
            exchange='',
            routing_key=self.queue,
            properties=pika.BasicProperties(
                reply_to='amq.rabbitmq.reply-to',
                content_type='application/json',
            ),
            body=json.dumps(data).encode('utf-8'))

        self.channel.start_consuming()

        return self.response

    def __exit__(self, exc_type, exc_value, traceback):
        self.connection.close()


if __name__ == '__main__':
    parser = argparse.ArgumentParser(description='Manage minikloud instances')
    subparsers = parser.add_subparsers(dest='subparser_name')
    create_vm_parser = subparsers.add_parser('start-vm')
    create_vm_parser.add_argument(
        '--image', help='Name of the image to start', required=True)
    subparsers.add_parser('list-vms')
    args = parser.parse_args()

    if args.subparser_name == 'list-vms':
        data = {
            'command': 'list-vms',
        }
    elif args.subparser_name == 'start-vm':
        data = {
            'command': 'start-vm',
            'options': {
                'image': args.image,
            }
        }
    else:
        print('Command does not exist', file=sys.stderr)
        sys.exit(1)

    with ServerCommunication() as c:
        result = c.send_msg(data)
You can test this code and might recognize one fundamental flaw in the current version:
(venv) blog_tutorial $ ./control.py list-vms
['vm-hrgvncob']
It does not return!
This is because we call channel.start_consuming() which makes our program
block and wait for messages infinitely. What we want instead is to wait for
a maximum number of seconds (if a response is expected) and return
on timeout or when a message is received. Since currently we do work with only
one host, we can set the number of expected responses to one, but with
multiple hosts we would not know the number of messages returned. Each host
would return its own list of running VMs and on the client we’d have to
combine them into one big list.
But let’s restrict ourselves to the simple case: one expected message for
list-vms and zero messages for start-vm. If we do not receive a message
for list-vms (e.g. something on the server-side broke), we will timeout
after a few seconds.
To achieve this I see several possibilities. We could:
- use the
blocked_connection_timeoutof the BlockingConnection - set a timer with
call_lateron aBlockingConnection - use
consumeon aBlockingChannelwithinactivity_timeoutset - set a timer with
call_lateron the IOLoop ofSelectConnection(not on the connection itself)
Since our little project currently does not need the SelectConnection
I will use call_later on the BlockingConnection. It allows us to exit from our class cleanly without
throwing an exception to the outer code.
class ServerCommunication:
    # ...

    def on_response(self, ch, method, properties, body):
        self.responses.append(json.loads(body))

        # Stopping consuming on the first message only works
        # as long as we only expect one message
        self.channel.stop_consuming()

    def on_timeout(self):
        self.channel.stop_consuming()

    def send_msg(self, data, response_expected=False):
        self.responses = []

        reply_to = None
        if response_expected:
            reply_to = 'amq.rabbitmq.reply-to'

        self.channel.basic_publish(
            # ...

        if response_expected:
            self.connection.call_later(5, self.on_timeout)
            self.channel.start_consuming()

        return self.responses

# ...

    if args.subparser_name == 'list-vms':
        response_expected = True
        data = {
            'command': 'list-vms',
        }
    elif args.subparser_name == 'start-vm':
        response_expected = False
        data = {
            'command': 'start-vm',
            'options': {
                'image': args.image,
            }
        }
    else:
        print('Command does not exist', file=sys.stderr)
        sys.exit(1)

    with ServerCommunication() as c:
        result = c.send_msg(data, response_expected)
        print(result)
Now we can list all available VMs and the command will return immediately.
list-vms command. Instead it should be sent over a
publish/subscribe pattern to all hosts. Moreover, with the current code we
will stop immediately after one received response. Instead we should wait for
all responses either by waiting a defined time span or even better by querying the number
of participating hosts first and then waiting for this number of messages.
Kill a VM
As a final step for this first tutorial (I might write follow-up tutorials on some of the outlined open points) we want to be able to stop a running VM. Since graceful shutdown is a bit harder with QEMU, we will focus on killing the VM first. We will just send the process a kill signal.
system_powerdown. The monitor
can be connected to a UNIX socket.
We already have done most of the hard work for the VM kill: All of our VMs have unique process names, we know how we can find a process with a given name and we also know how we can send a response to the client.
A kill message will look as follows (already preparing to be able to shutdown gracefully):
{
    'command': 'stop-vm',
    'options': {
        'kill': True,
        'vm-id': 'vm-abcdefgh'
    }
}
The server will respond to a stop request with a response whether the machine was successfully stopped or not. At first, let’s adjust the client code:
if __name__ == '__main__':
    parser = argparse.ArgumentParser(description='Manage minikloud instances')
    subparsers = parser.add_subparsers(dest='subparser_name')
    create_vm_parser = subparsers.add_parser('start-vm')
    create_vm_parser.add_argument(
        '--image', help='Name of the image to start', required=True)
    create_vm_parser = subparsers.add_parser('stop-vm')
    create_vm_parser.add_argument(
        '--vm-id', dest='vm_id', help='ID of the VM to stop', required=True)
    subparsers.add_parser('list-vms')
    args = parser.parse_args()

    if args.subparser_name == 'list-vms':
        response_expected = True
        data = {
            'command': 'list-vms',
        }
    elif args.subparser_name == 'start-vm':
        response_expected = False
        data = {
            'command': 'start-vm',
            'options': {
                'image': args.image,
            }
        }
    elif args.subparser_name == 'stop-vm':
        response_expected = True
        data = {
            'command': 'stop-vm',
            'options': {
                'kill': True,
                'vm-id': args.vm_id,
            }
        }
    else:
        print('Command does not exist', file=sys.stderr)
        sys.exit(1)

    with ServerCommunication() as c:
        result = c.send_msg(data, response_expected)
        print(result)
Next, we have to adjust the server code. We will create a new function
get_process_for_vm which searches for a given VM and returns the psutil.Process
if it exists. On the process we can then call kill.
from typing import List, Optional

# ...

def get_process_for_vm(vm_id: str) -> Optional[psutil.Process]:
    for proc in psutil.process_iter(['name']):
        if proc.name() == vm_id:
            return proc.pid

    return None


def callback(ch, method, properties, body):
    # ...

    if 'command' not in data:
        return
    elif data['command'] == 'list-vms':
        response = list_vms()
    elif data['command'] == 'stop-vm':
        try:
            vm_id = data['options']['vm-id']
        except KeyError:
            print('VM ID not specified', file=sys.stderr)
            return

        process = get_process_for_vm(vm_id)
        if process:
            process.kill()
            response = {
                'status': 'killed',
                'vm-id': vm_id,
            }
        else:
            response = {
                'status': 'error',
                'reason': f'VM "{vm_id}" does not exist',
            }

    # ...
If you test this code, you should see it working:
(venv) blog_tutorial $ ./control.py start-vm --image ubuntu_base
[]
(venv) blog_tutorial $ ./control.py list-vms
[['vm-ffhcuxtv']]
(venv) blog_tutorial $ ./control.py stop-vm --vm-id vm-ffhcuxtv
[{'status': 'killed', 'vm-id': 'vm-ffhcuxtv'}]
(venv) blog_tutorial $ ./control.py stop-vm --vm-id vm-invalid
[{'status': 'error', 'reason': 'VM "vm-ffhcuxt" does not exist'}]
Further Ideas
With this, I want to finish this tutorial. There are several things that can be improved, but this tutorial should show how in general we can create our own scalable VM hosting based on QEMU and RabbitMQ. I already listed many open points you can start working on in the info boxes above, so let’s talk about some other ones.
Currently the VMs are not connected to a private network. This means that they can only communicate with each other using their public IPs (or pseudo public as in my case, since I started them on a local subnet). The desirable state would be for them to be able to join private subnets with other VMs. I am already working on this, but since I wanted to learn about IPv6 it’s not ready, yet. It can be achieved with a Layer-2 VPN with tinc.
Multiple customer management is not possible at the moment. A call to
list-vms will list all running VMs. While this is probably not an important
thing for such a hobby project, it would be fun to be able to run different
projects on different namespaces and with different scopes.
Auto-scaling is a point which I would love to add. We can separate auto-scaling into two use cases:
- replacing broken machines with some sort of health check
- scaling a distributed application due to changing load
This would need another component that actively monitors these status and metrics and then sends messages to our current VM start/stop implementation.
Moreover, it our VM currently only boots with the default image and it’s not
possible for a user to execute custom commands during boot (called user-scripts
in EC2). I did a proof-of-concept for this by mounting the image on the host
and copying a systemd service on it before boot. I am not sure though
whether this is the best way.
If you have any other ideas, feel free to send me an email.
I do not maintain a comments section. If you have any questions or comments regarding my posts, please do not hesitate to send me an e-mail to blog@stefan-koch.name.